Blog
3D asset creation has become an indispensable skill across various industries. From video games and films to product design and architectural visualization, 3D assets breathe life into virtual environments and bring ideas to reality. This comprehensive guide will walk you through the intricate process of 3D asset creation, offering insights into best practices, tools, and techniques used by professionals. Whether you're a beginner looking to dive into the world of 3D or an experienced artist aiming to refine your workflow, this ultimate guide to 3D asset creation will provide valuable knowledge to elevate your skills.
What is a 3D Asset?

A 3D asset is a digital representation of a three-dimensional object or environment created using specialized software. These assets form the building blocks of virtual worlds, bringing depth, realism, and interactivity to digital experiences. From characters and props to entire landscapes, 3D assets are the cornerstone of modern visual content creation.
The Significance of 3D Assets Across Industries
The impact of 3D assets extends far beyond the realm of entertainment. Let's explore how various sectors leverage 3D asset creation:
a) Gaming: In the video game industry, 3D assets are the lifeblood of immersive experiences. From character models and environments to props and special effects, every element players interact with is a carefully crafted 3D asset.
b) Film and Animation: 3D assets have revolutionized the film industry, enabling filmmakers to create stunning visual effects and fully animated features. These assets bring fantastical creatures, imaginary worlds, and impossible stunts to life on the big screen.
c) Architecture and Real Estate: Architects and real estate professionals use 3D assets to create lifelike visualizations of buildings and interiors. This allows clients to explore spaces and make informed decisions before construction begins.
d) Product Design: From consumer electronics to furniture, 3D assets enable designers to prototype, iterate, and showcase products in a virtual environment. This streamlines the design process and enhances marketing efforts.
e) Medical and Scientific Visualization: 3D assets play a crucial role in creating detailed anatomical models, molecular structures, and scientific simulations, advancing research and education in these fields.
The 3D Asset Creation Workflow: An Overview
A structured workflow is essential for creating high-quality 3D assets efficiently. While specific steps may vary depending on the project and industry, the general 3D asset creation workflow typically includes the following stages:
a) Concept and Planning: This initial stage involves defining the asset's purpose, gathering reference materials, and creating preliminary sketches or mood boards.
b) Modeling: The process of creating the 3D geometry that forms the base structure of the asset.
c) UV Unwrapping: Preparing the 3D model's surface for texturing by creating a 2D representation of its 3D surface.
d) Texturing: Applying colors, materials, and surface details to the 3D model.
e) Rigging (if applicable): Creating a skeleton structure for characters or objects that need to be animated.
f) Animation (if required): Bringing the asset to life through movement and performance.
g) Lighting and Rendering: Setting up the scene's illumination and generating the final image or animation.
h) Post-processing: Applying final touches and effects to enhance the visual quality of the rendered asset.
i) Optimization and Integration: Preparing the asset for its intended use, whether in a game engine, film pipeline, or other applications.
Concept and Planning: Laying the Foundation
The concept and planning stage is crucial for successful 3D asset creation. This phase sets the tone for the entire project and ensures that the final asset meets its intended purpose.
Defining the Asset's Purpose
Before diving into creation, it's essential to define the asset's purpose clearly. Ask yourself:
- What is the asset's role in the project?
- Who is the target audience?
- What level of detail is required?
- What are the technical constraints (e.g., polygon count, texture resolution)?
Understanding these factors will guide your decisions throughout the creation process.
Gathering Reference Materials Reference gathering is a critical step often overlooked by beginners. Collect a variety of reference images and materials related to your asset. This may include:
- Photographs of similar objects
- Concept art
- Technical drawings or blueprints
- Material samples
Organize your references in a mood board or reference sheet for easy access during the creation process.
Creating Preliminary Sketches
For complex assets, creating rough sketches can help visualize the asset from different angles. These sketches don't need to be highly detailed; they serve as a guide for the 3D modeling phase.
3D Modeling: Bringing Your Asset to Life

3D modeling is the process of creating the three-dimensional geometry that forms the basis of your asset. This stage requires a good understanding of topology and 3D software.
Choosing the Right Modeling Technique
Several modeling techniques can be used, depending on the asset type and its intended use:
- Box modeling: Starting with a basic shape and refining it
- Polygon modeling: Building the model polygon by polygon
- NURBS modeling: Using curves to define smooth surfaces
- Sculpting: Molding the model as if working with digital clay
Each technique has its strengths, and often, a combination of methods is used to achieve the desired result.
Maintaining Good Topology
Good topology is crucial for creating high-quality 3D assets. It affects everything from the asset's appearance to its performance in real-time applications. Key principles of good topology include:
- Using quads (four-sided polygons) whenever possible
- Maintaining edge flow that follows the asset's form
- Avoiding n-gons (polygons with more than four sides)
- Placing additional geometry in areas of high detail or deformation
Tools and Software for 3D Modeling
Popular 3D modeling software includes:
- Autodesk Maya
- Blender (open-source)
- ZBrush (for digital sculpting)
- 3ds Max
- Cinema 4D
Each software has its strengths, and the choice often depends on personal preference and industry standards.
UV Unwrapping: Preparing for Texturing
UV unwrapping is the process of creating a 2D representation of your 3D model's surface. This step is crucial for proper texturing and can significantly impact the final quality of your asset.
Understanding UV Space UV coordinates correspond to the X and Y axes of a 2D texture. Proper UV unwrapping ensures that textures are applied correctly to your 3D model without stretching or distortion.
UV Unwrapping Techniques Common UV unwrapping techniques include:
- Planar mapping: Projecting UVs from a single direction
- Cylindrical mapping: Useful for cylindrical objects
- Spherical mapping: Ideal for spherical objects
- Pelt mapping: Flattening the UV shell as if it were an animal pelt
- Manual unwrapping: Creating custom seams and unfolding the UV shell
The choice of technique depends on the asset's shape and complexity.
Optimizing UV Layout
An efficient UV layout maximizes texture resolution while minimizing wasted space. Consider these tips:
- Prioritize important areas with more UV space
- Keep related elements close together in UV space
- Align UV islands to texture pixels to prevent blurring
- Use mirroring for symmetrical objects to save texture space
- Texturing: Adding Color and Detail
Texturing is the process of applying colors, materials, and surface details to your 3D model. This stage breathes life into your asset, defining its visual characteristics and enhancing its realism.
Types of Textures Different types of textures work together to create a realistic appearance:
- Diffuse/Albedo: The base color of the asset
- Normal: Adds fine surface details without increasing geometry
- Specular: Defines how light reflects off the surface
- Roughness: Controls the micro-surface detail affecting reflections
- Metallic: Determines which parts of the surface are metallic
- Ambient Occlusion: Adds subtle shadowing in crevices
Texturing Techniques
Several techniques can be used for texturing 3D assets:
a) UV Texture Painting: Directly painting on the 3D model or its UV layout
b) Procedural Texturing: Using algorithms to generate textures
c) Photo-based Texturing: Utilizing photographs as a base for textures
d) Substance Designer: Creating complex, tileable materials
e) PBR (Physically Based Rendering): A method that mimics real-world material properties
Texturing Software Popular texturing tools include:
- Adobe Substance Painter
- Mari
- Quixel Mixer
- Blender (for basic texturing)
- Photoshop (for creating texture maps)
When texturing, consider the asset's purpose and the rendering engine it will be used in. Different engines may require specific texture formats or workflows.
Rigging: Preparing for Animation
Rigging is the process of creating a skeleton structure for characters or objects that need to be animated. This step is crucial for assets that require movement or deformation.
Creating the Skeleton The rigging process typically involves:
- Placing joints in key areas of the model
- Creating a hierarchy of joints
- Setting up inverse kinematics (IK) for natural movement
- Adding control objects for easier animation
Skinning
After creating the skeleton, the next step is skinning - binding the 3D mesh to the rig. This process determines how the mesh deforms when the rig moves. Proper skinning is essential for creating believable animations.
Weight Painting
Weight painting allows you to fine-tune how much influence each joint has on different parts of the mesh. This step is crucial for achieving smooth deformations and avoiding unwanted distortions during animation.
Animation: Bringing Your Asset to Life
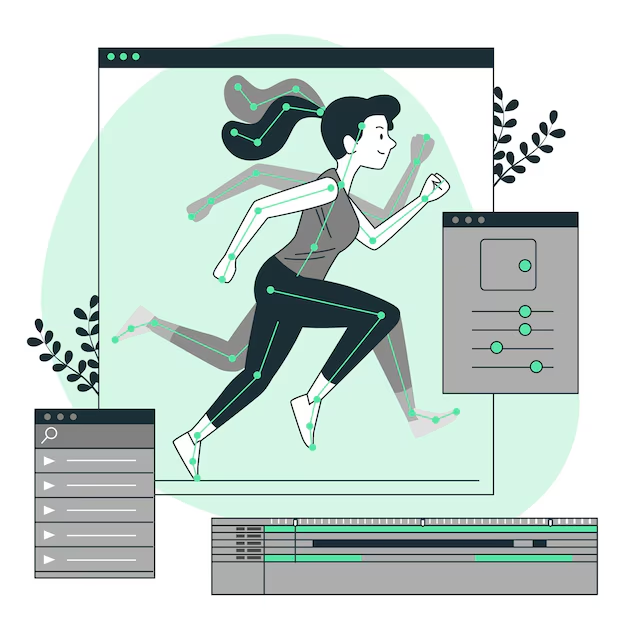
If your 3D asset requires movement, the animation stage is where you breathe life into it. Whether it's a character walking, a machine operating, or environmental elements moving, animation adds dynamism to your asset.
Keyframe Animation
The most common animation technique involves setting keyframes at specific points in time and letting the software interpolate the in-between frames. This method gives animators precise control over timing and movement.
Motion Capture
For more complex character animations, motion capture technology can be used to record real-world movements and apply them to 3D models. This technique is widely used in film and game production for creating realistic character movements.
Procedural Animation
Some animations can be generated procedurally using algorithms. This is particularly useful for repetitive movements or large-scale animations like crowd simulations.
Animation Principles
Regardless of the technique used, understanding and applying the 12 principles of animation is crucial for creating compelling and believable movements. These principles, originally developed by Disney animators, include:
- Squash and stretch
- Anticipation
- Staging
- Straight ahead action and pose to pose
- Follow through and overlapping action
- Slow in and slow out
- Arc
- Secondary action
- Timing
- Exaggeration
- Solid drawing
- Appeal
By mastering these principles, animators can create more engaging and lifelike animations, regardless of the style or realism level of the asset.
Lighting and Rendering: Showcasing Your Asset
Lighting and rendering are crucial steps in presenting your 3D asset in the best possible way. Good lighting can enhance the asset's features, create mood, and bring out the details in textures and materials.
Types of Lighting
Different types of lights can be used to illuminate your 3D asset:
- Point lights: Emit light in all directions from a single point
- Spot lights: Direct light in a cone shape
- Directional lights: Simulate distant light sources like the sun
- Area lights: Emit light from a defined area, creating soft shadows
- Environment lighting: Uses HDR images to create realistic ambient lighting
Lighting Techniques
Consider these lighting techniques to enhance your 3D asset:
- Three-point lighting: A classic setup using key, fill, and back lights
- Global Illumination: Simulates how light bounces off surfaces
- HDR lighting: Uses high dynamic range images for realistic lighting
Rendering
Rendering is the process of generating the final image or animation from your 3D scene. There are two main types of rendering:
a) Real-time rendering: Used in games and interactive applications, prioritizing speed over absolute realism.
b) Offline rendering: Used in film and high-end visualizations, allowing for more complex calculations and higher quality results.
Popular rendering engines include:
- Arnold
- V-Ray
- Redshift
- Unreal Engine (for real-time rendering)
- Cycles (Blender's built-in renderer)
- Post-processing: Adding the Final Touch
Post-processing involves applying final touches to enhance the visual quality of the rendered asset. This can include:
- Color grading
- Depth of field effects
- Bloom and lens flares
- Motion blur
- Ambient occlusion
These effects can be applied in compositing software like Nuke, After Effects, or directly within some 3D applications.
Optimization and Integration: Preparing for Use
The final stage of the 3D asset creation workflow involves optimizing the asset for its intended use and integrating it into the target platform or application.
Optimization Techniques
Depending on the asset's purpose, you may need to optimize it for performance:
- Reduce polygon count through retopology
- Create LODs (Levels of Detail) for use at different distances
- Optimize texture sizes and formats southwest cancellation policy
- Simplify materials and shaders for real-time applications
Integration
The integration process varies depending on the target platform:
- For games: Importing into a game engine like Unity or Unreal Engine
- For film: Integrating into the production pipeline and scene assembly
- For AR/VR: Ensuring compatibility with AR/VR development platforms
- For product visualization: Preparing for use in configurators or online viewers
Emerging Trends in 3D Asset Creation

As technology evolves, new trends are shaping the future of 3D asset creation:
- Procedural Generation: Using algorithms to create complex assets and environments
- AI-assisted Creation: Leveraging machine learning for tasks like texturing and animation
- Real-time Ray Tracing: Achieving photorealistic results in real-time applications
- Virtual Production: Blending 3D assets with live-action footage in real-time
- 3D Scanning and Photogrammetry: Creating highly detailed assets from real-world objects
Conclusion
Mastering the 3D asset creation workflow is a journey that requires dedication, creativity, and technical skill. From the initial concept to the final integration, each stage plays a crucial role in bringing your vision to life. By understanding and optimizing each step of the process, you can create stunning 3D assets that captivate audiences across various industries.
Remember that while tools and technologies may change, the fundamental principles of good design, efficient workflow, and attention to detail remain constant. Stay curious, keep learning, and don't be afraid to experiment with new techniques and technologies.
Whether you're creating assets for games, films, product design, or any other field, the skills you develop in 3D asset creation will open up a world of possibilities. As the demand for high-quality 3D content continues to grow, your expertise in this field will become increasingly valuable.
